Plastering
Dot And Dab Thickness And How To Apply
Written by Dale Richardson - Updated: June 23, 2023
Stay Updated with Expert Tips!
Love our DIY guides and solutions for common household problems? Get expert advice, tips, and exclusive offers in our newsletter. From garden hacks to home maintenance and special deals, we've got it all. Join our growing community now!
Dot and dab is a common process used in plastering. It's the name given to the most popular method of applying plasterboard to a solid wall with adhesive. It's also known as dry lining, and has become the industry standard for plasterboard application. If you're looking to do a bit of DIY plasterboard installation, you're likely wondering how exactly to do it. We'll cover the proper dot and dab thickness in this article, along with a basic guide of how to actually do it.
The ideal dot and dab thickness for plasterboard is 10 mm minimum, a total thickness (adhesive and plasterboard) of 25 mm.
There's a bit of extra information that I can't really include in a snippet. That means you'll need to keep reading for a thorough guide of dot and dab.
Dot and Dab Basics
Also known as drylining, dot and dab is the best way to directly apply plasterboard to flat and secured walls. The important factor here is that the wall has a "key." In short - your adhesive needs something to adhere to, like a porous or rough surface. It's very common when plastering over masonry and clockwork, though the surface may require a bit of preparation.
If working with a really smooth surface, many people opt to use mesh wire as a base. This provides a nice substrate for your adhesive to grip and ensures it'll last. The biggest reason dot and dab is so popular with professionals is speed and ease. It's faster, cheaper, easier, and cleaner than wet plastering or really any of the other options available.
It also has the added benefit of being able to immediately paint or decorate your wall. This makes is extra popular in development homes that go up seemingly overnight.
What Will You Need?

To dot and dab plasterboard, you need several things:
- Plasterboard
- Adhesive
- Bucket & dowel or scrap wood for mixing
- Trowel
- Measuring tape
- Nails & hammer or power drill and screws
- Optional: metal mesh
- Protective equipment:
- gloves
- dust mask
- eye protection
- hard hat
- safety shoes
It's generally best to look for plasterboard that's at least 12.5 mm thick. A plasterboard of this thickness is more rigid and will improve the longevity of your walls. Choosing wide plasterboard allows you to reduce the number of joints in your wall (speeding up the process).
It's also good to consider if you'll need additional protection from sound, moisture, or heat. In other words, do you need insulation, soundproofing, or dampness control? If so, look for specialised plasterboard to suit your needs.
Should you plan on skimming plaster, you'll need square edge plasterboard. On the other hand, if you're jointing the plasterboard, you'll need tapered edge boards to make a smooth junction and finish.
Amount of Adhesive

While this will vary based on your particular wall and needs, there are a few general guidelines to keep in mind. On average, you want your adhesive to be roughly 10mm thick, 250 mm long (roughly), and between 50 and 75 mm wide. It will take three vertical rows per board, making each dab 15-20 cm below the last.
You'll also need enough adhesive to cover the perimeter of the wall, including the ceiling edge, openings (such as ventilation or windows) and the base skirt level.
Mixing & Drying Adhesive
There's no hard-and-fast rule for how to mix plasterboard adhesive. You're more looking for consistency rather than a specific ratio. You need to add enough water that it's thick and holds well while being thin enough to spread.
Mix it in batches. You want the adhesive to not set until it's on the wall. Mixing a big batch runs the risk of you either:
- Rushing to finish -This can happen if you find your adhesive is setting too quickly. A rushed job is a sloppy job, meaning it'll likely perform worse than if you took your time.
- Adhesive setting too early -If your adhesive sets in the bucket, you're out both a bucket and some adhesive. This not only costs time, but money - and you don't want to lose either. So be smart - mix in batches.
Plasterboard adhesive takes roughly 3-6 hours to set, depending on the mixture. While waiting on it to dry, you can carry on with the project. Skim or finish the jointing while it dries - you've got the time.
How to Dot and Dab

Before you ask, no, we're not teaching a hip, cool new dance. We're showing you something infinitely cooler - plastering technique. Now, onto the guide:
- Mark the ceiling and floor where the board will lie, accounting for coving and skirting where necessary. Mark the centre of your boards as well.
- Cut the plasterboard to 15 mm below the height of the wall.
- Mix your adhesive in a bucket with a dowel or piece of scrap wood.
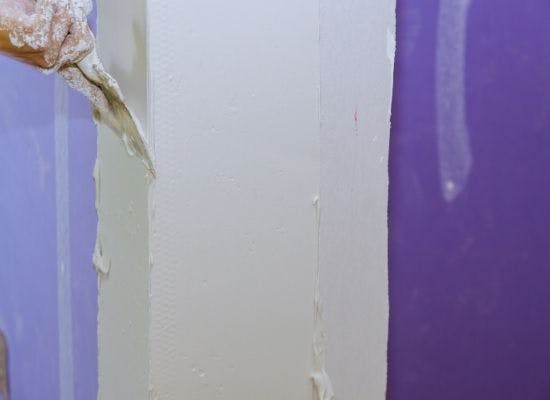
- Using a trowel, apply a coninuous strip of adhesive around the border of the wall, ceiling, skirting, and any doors, windows, or ventilation.
- Apply the adhesive in dabs roughly 50-75 mm wide, 250 mm long. Work in sections (roughly 3 per board) to ensure an even, thorough coat. Keep all edges of adhesive at least 25 mm from the edge of your plasterboard.
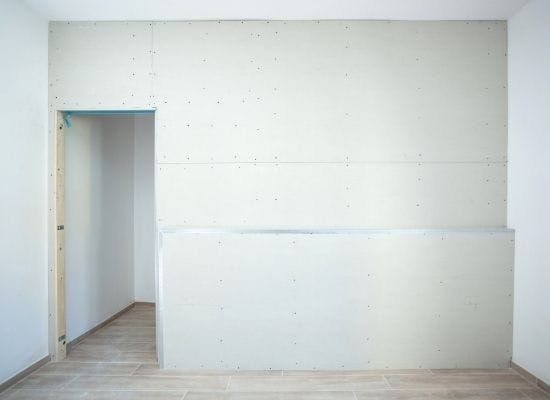
- Place the plasterboard against the dabs, resting it on plasterboard packers. Tap it into place using a straight edge until it's level and meets the marks you made in step 1.
- Raise the board until it's tight against the ceiling. Wedge it into place with packers again, and leave it to dry and set.
- Repeat, moving the packers as you go. The plasterboard should be secured by the time you finish each section, but be sure to check before removing them. You don't want your hard work to come crashing down - that would be a bummer.
- Success!
Final Thoughts
Once you've got the hang of it, dot and dab is a super easy and quick way to apply plasterboard. Assuming it's got a good key (substrate) that it can attach to, it'll hold just as well as with other methods, but go on in a fraction of the time. And best of all, there's little to no mess!
While this is more of a guideline than a hard-and-fast rule, it's generally best to keep your dot and dab relatively thin. Apply it in dabs roughly 50-75 mm wide, 250 mm long, and roughly 10 mm thick. This will get the best performance while still drying in a reasonable amount of time. If you go too thick, the adhesive will take a long time to dry, preventing you from moving on.
One More Thing Before You Go!
Craving more DIY insights? Don't miss our expert guides and exclusive deals. Subscribe now and get the best of home and garden tips straight to your inbox. Join our community and stay in the know!
Get Cashback Faster & Earn Free Fraffle Tickets
Shop at your favourite stores and enjoy cashback in days, not months. Plus, sign up today to get 5x Free Fraffle tickets!


Related Topics To Read Next